
Leveraging Escalation Attacks in Penetration Testing Environments – Part 1
Authors: Eugene Mar and Brian Mitchell
Introduction
Together we aim to explore vulnerabilities within Active Directory Certificate Services (AD CS), delving into its vulnerabilities and potential attacks. While there is an abundance of content out there, we felt the need to present a guide that not only details these attacks but also leads you through an engaging experience in lab building, vulnerability testing, and remediation. Although there are projects (GOAD and Ludus) that will help us build a vulnerable Active Directory lab, we have found the most profound learning comes from hands-on experience. In the following sections, we will introduce AD CS, outline lab setup, demonstrate vulnerability exploits, and reveal remediation steps. For an explanation of ESC1 and ESC8, please refer to this article.
References
Before continuing, we want to give credit to Will Schroeder and Lee Christensen who released whitepapers on abusing AD CS. Without their research this post would not have been possible.
https://posts.specterops.io/certified-pre-owned-d95910965cd2
https://specterops.io/wp-content/uploads/sites/3/2022/06/Certified_Pre-Owned.pdf
https://github.com/ly4k/Certipy
What is Active Directory Certificate Services?
So, what exactly is Active Directory Certificate Services (AD CS)?
In simple terms, Microsoft explains AD CS as a service that issues and manages digital certificates. These digital certificates are crucial in software security systems that use public key technologies. They’re like virtual ID cards, proving an identity in the digital world.
These certificates can be used for many tasks, like encrypting and digitally signing electronic documents and messages. Imagine them as your own personal decoder ring – ensuring that your information stays confidential and authentic.
Digital certificates also play a key role in the authentication of computers, users, or device accounts on a network. In short, they’re gate guardians, verifying proper access.
Per Microsoft documentation, certificates provide three key features:
- Confidentiality: Through encryption, they keep your secrets, well… secret!
- Integrity: Thanks to digital signatures, we can ensure the message originated from the sender was not altered.
- Authentication: They associate certificate keys with computers, users, or device accounts, verifying our identity on a network.
So, that’s a high-level overview of AD CS!
Lab Setup
Now that we have a basic understanding of AD CS, it’s time to roll up our sleeves and get our hands dirty.
There are various options available for setting up this lab, such as using a personal server, a computer, or a cloud-based solution. The set-up should be similar no matter which platform you decide to choose. For this example, we decided to build our environment using Immersive Labs. Immersive Labs is free to use – all we need is an account and connect our Amazon Web Services (AWS) account. Because Immersive Labs deploys systems through AWS there will be a cost to run this lab. At the time of writing this blog, the cost was around $0.20 an hour USD.
This practical experience provides a valuable opportunity to gain experience of setting up an Active Directory domain and AD CS basics without much overhead. Thus, we invite you to prepare for an insightful journey into the workings of Active Directory Certificate Services.
Let’s begin with the inventory. We’ll need a Domain Controller, Active Directory Certificate Services server, and a Linux VM (virtual machine). We will use the Linux VM to conduct our offensive security techniques, and we’ll refer to it as “attacker” machine.
Once we’ve created an account and connected it to AWS from Immersive Labs, we need to create a custom range. Let’s begin by browsing to https://dashboard.snaplabs.io/. Select “Ranges” on the left-hand side of the page, then select “Create new Range”, fianlly “Blank Range”.
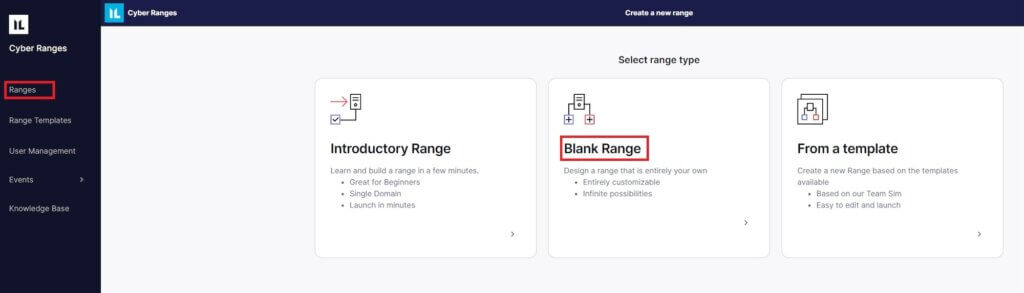
Alternatively, we provided a Range Template that is already vulnerable to ESC8. If we choose this alternative option, we will instead select “From a template” option, shown in the screenshot above, and import the provided range template. By doing this, we will skip the manual build of the lab and jump straight into the exploitation phase.
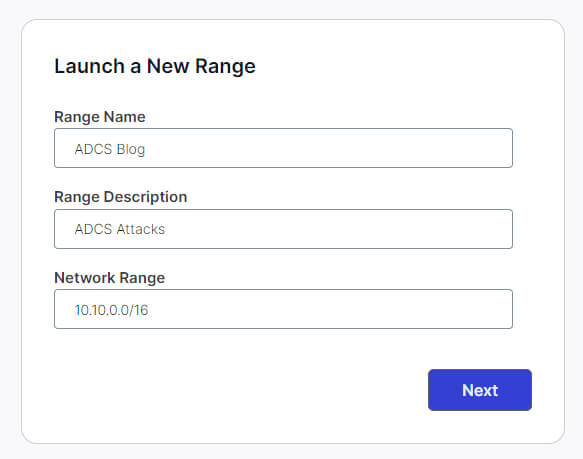
Next, select “Launch a New Range”, and provide the lab Range Name, Range Description, and the default network range of 10.10.0.0/16, as shown below.
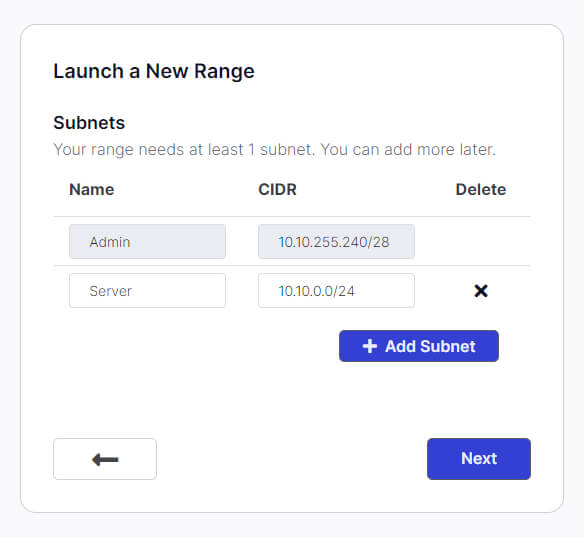
After clicking Next, we will specify our subnets. Leave the default setting for the admin subnet and create a new server subnet named “Server” with the network range of 10.10.0.0/24. Click Next.
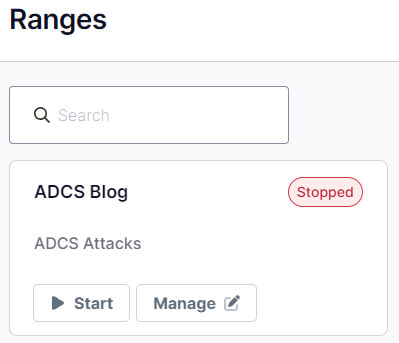
We’ll leave the default attacker VPN interface, so click Launch. Once launched, our new range will appear in the Ranges tab.
We also need to create a few servers for our environment. Click Manage.
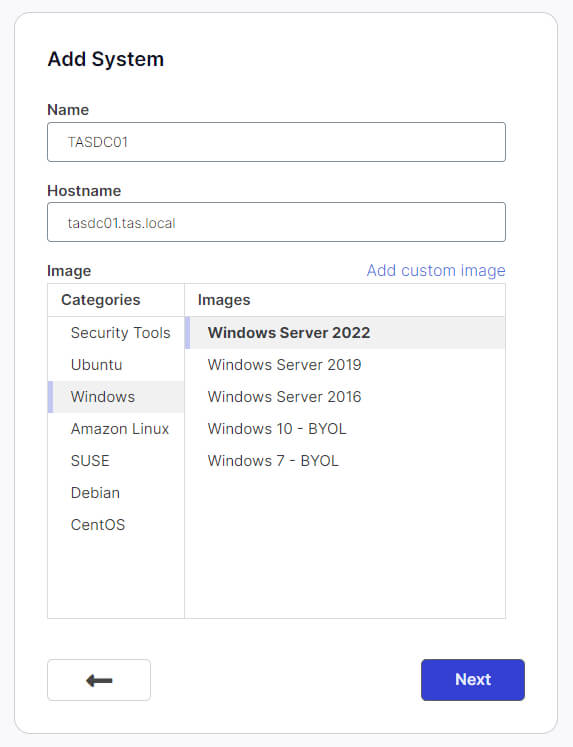
In the new window, click “New System” to add a system. We are presented with a list of operating systems.
Input a Name and Hostname and select an operating system. Since we are building a domain controller, we recommend Windows Server 2022.
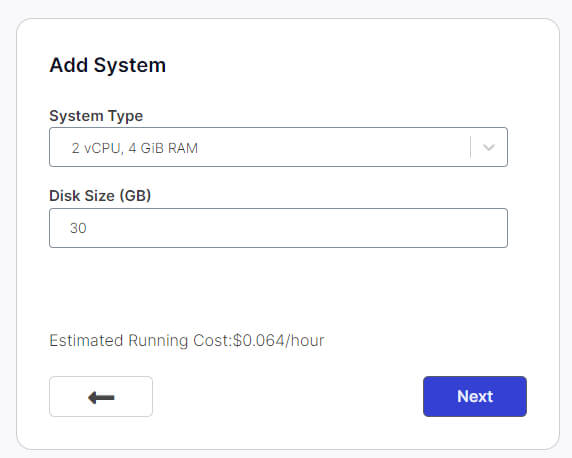
After clicking Next, we will configure the “System Type” and “Disk Size”. For “System Type”, select 2 vCPU, 4 GiB Ram and for “Disk Size” leave the default value of 30 GB.
This page will also provide the Estimated Running Cost per hour. Click Next.
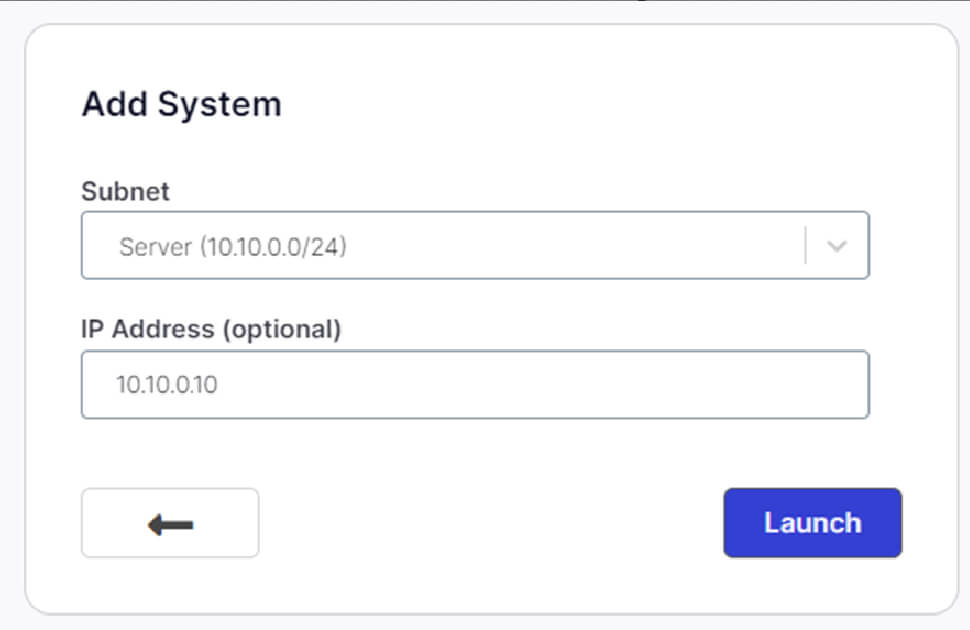
Provide the system with an IP Address of 10.10.0.10 and click Launch. Within a minute we should have a powered on virtual machine configured as a Windows 2022 server.
Return to the Manage page, find the newly created system, and click “Connect.”

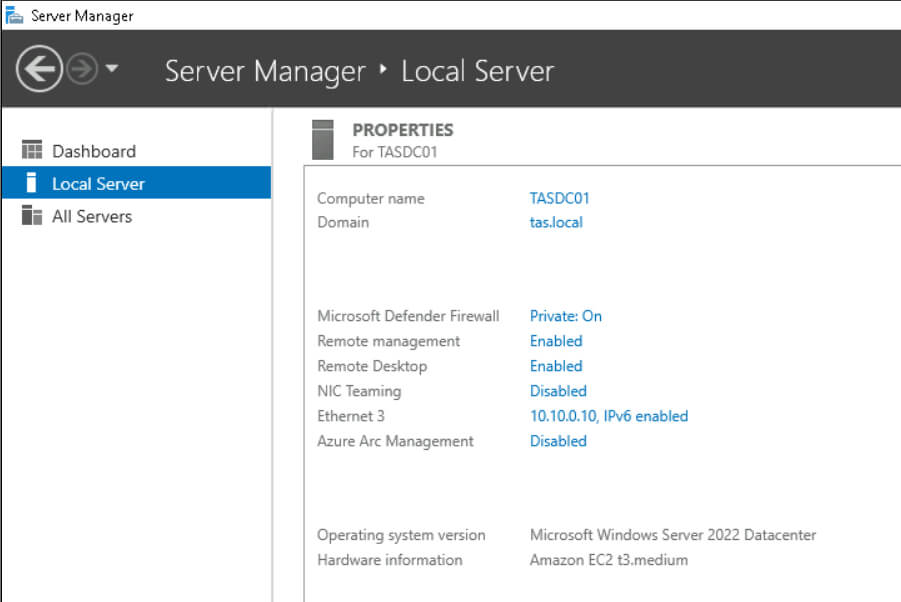
This will initiate a connection to the Windows Server 2022 machine via the web browser and automatically log in as the default user.
Configuring the Domain Controller
Our Windows Server will be visible in the Ranges menu. Next, we’ll need to connect to the Windows Server and configure it to a Domain Controller (DC). To connect to the server from the Ranges page, click “Manage.”. We will need to wait a few minutes to fully power on the machine, then click “Connect” on the Windows Server to connect via the web browser. By default, we will log in as the local Administrator user.
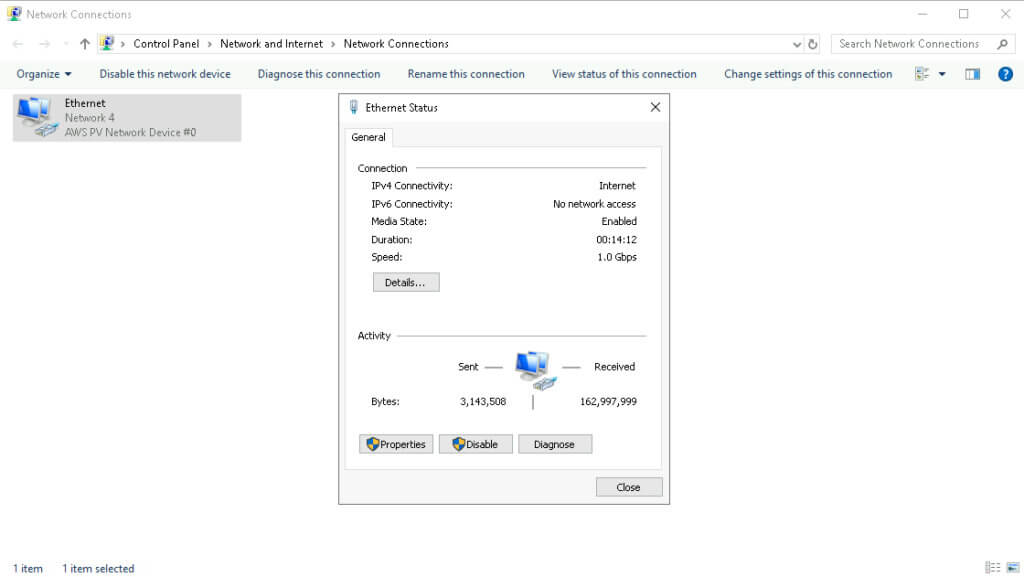
Select the Start menu at the bottom-left and launch Server Manager. The next steps take us through a process of configuring the network adapter from DCHP to a static IP address and changing the hostname. In Server Manager, on the left-hand side under Dashboard, click Local Server and then click the IPv4 address assigned by DHCP.
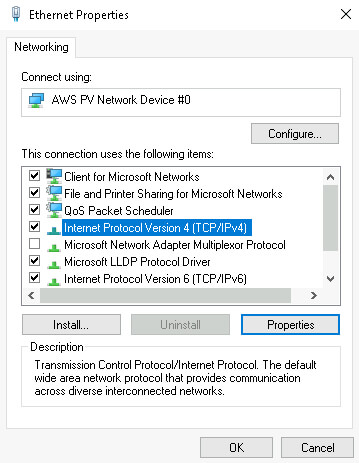
Next, double-click Ethernet Status and then, in the new window, click Properties.
Now, double-click on Internet Protocol Version 4 (TCP/IPv4).
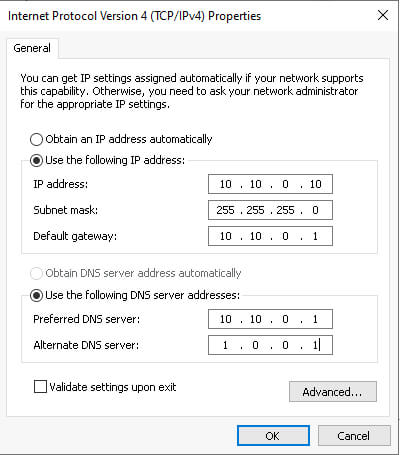
Then, input the IP address, subnet mask, default gateway, and DNS servers. We recommend using the default network range within Snap Labs, as shown below:
Once we click OK, we will lose connection for a few seconds before we reconnect.
With a static IP address configured, we’ll need to set the hostname of the system. To do this, right-click the Start menu, then click System. Click “Rename your PC.” Provide a hostname and restart the server.
With the server backup we can add the appropriate roles to promote this server to a Domain Controller.
First, within the Server Manager dashboard, click “Add roles and features.”
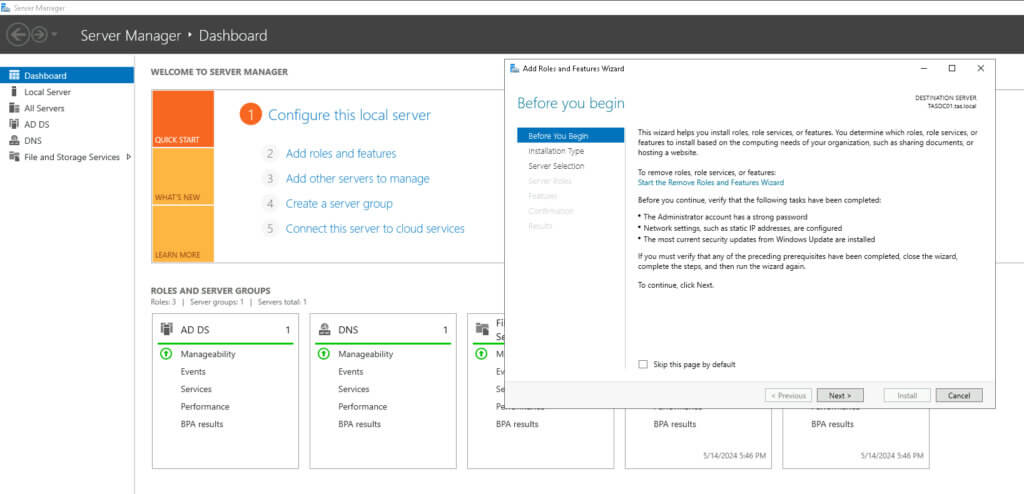
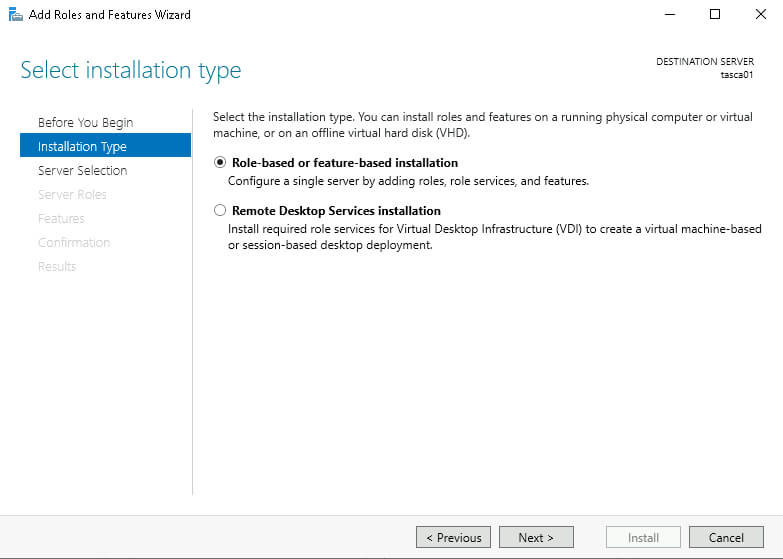
Click Next on the Before You Begin page. Then, ensure we select “Role-based or feature-based installation” on the Installation Type page and click Next.

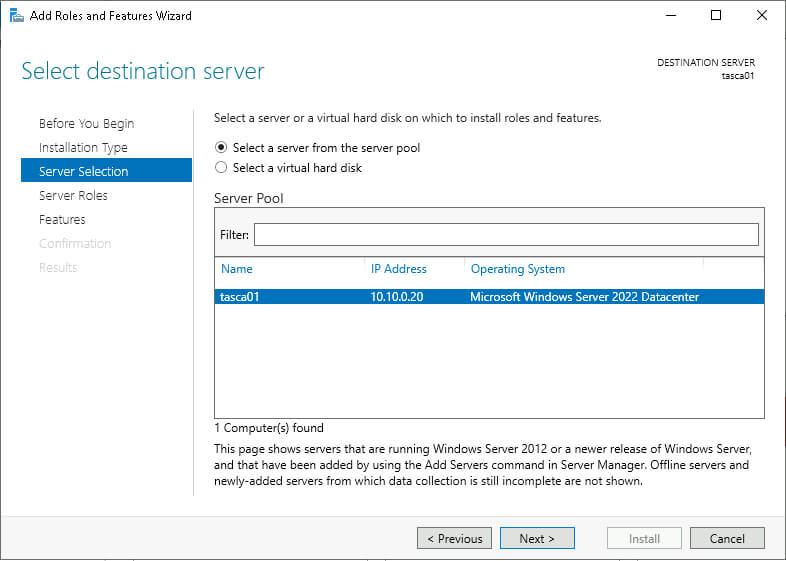
On the following page, with our server selected, click Next. On the Server Roles page, select Active Directory Domain Services.
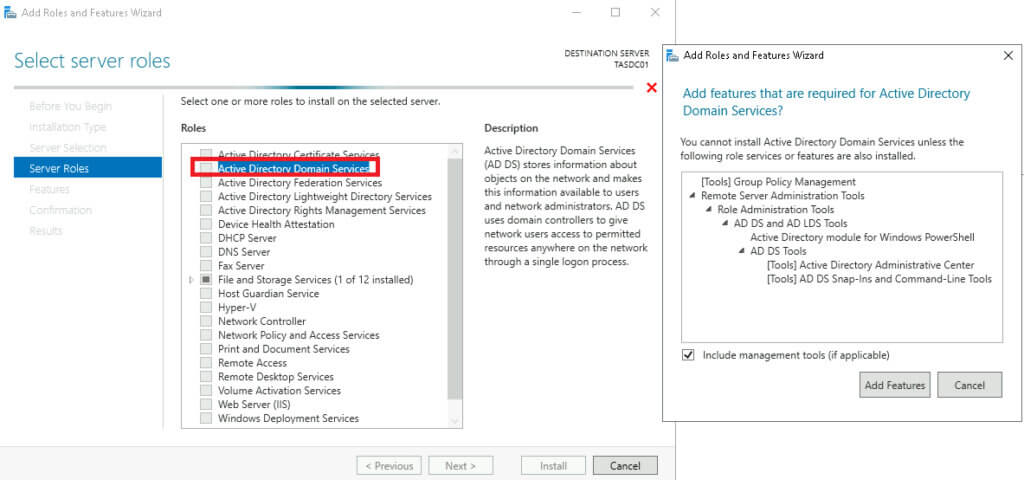
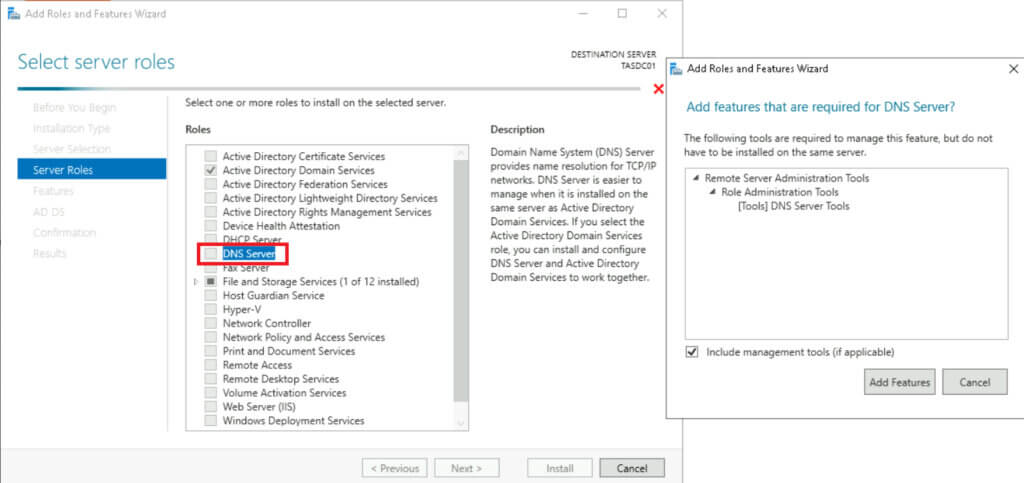
In the pop-up, select “Include management tools (if applicable)” and click Add Features. On the Server Roles menu, select DNS Server, and again click Add Features on the pop-up. Click Next.
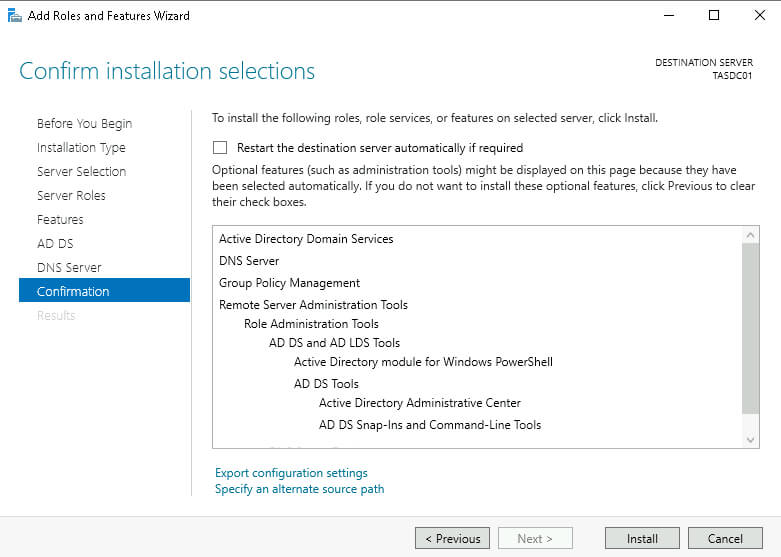
Then, on the Features page, click Next followed by Next on the AD DS page and again, Next on the DNS Server page. Check the box for “Restart the destination server automatically if required” option and confirm “Yes” that we want the system to reboot if required. Finally, click Install.
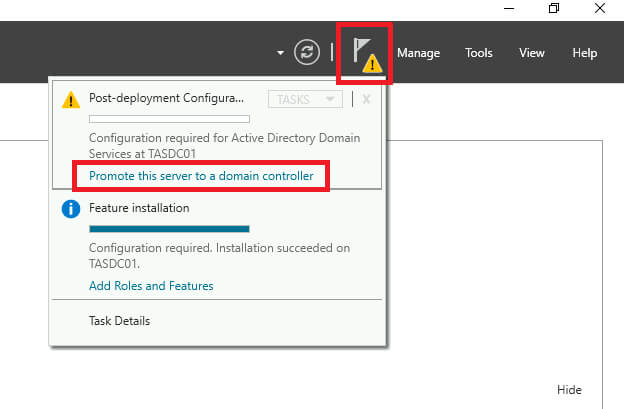
Once the installation is complete, click “Promote this server to a domain controller” shown under the Notification area of the menu bar (flag icon).
Let’s “Add a new forest” and provide our Root domain name. In this instance, use TAS.LOCAL.
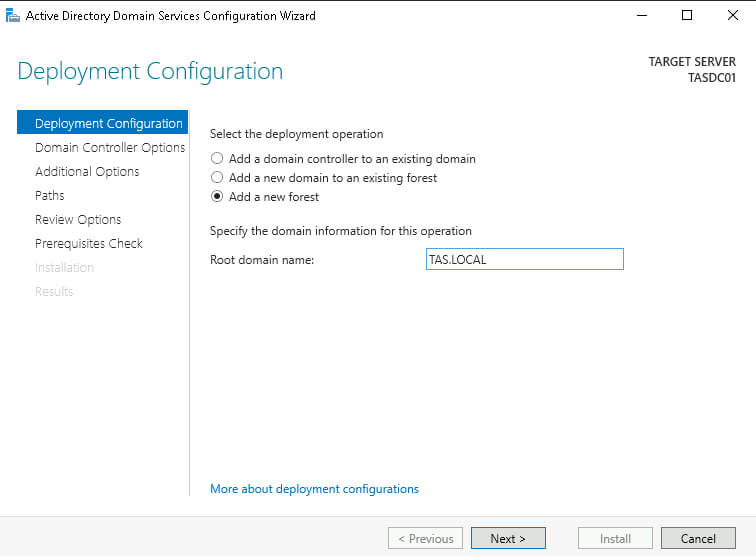
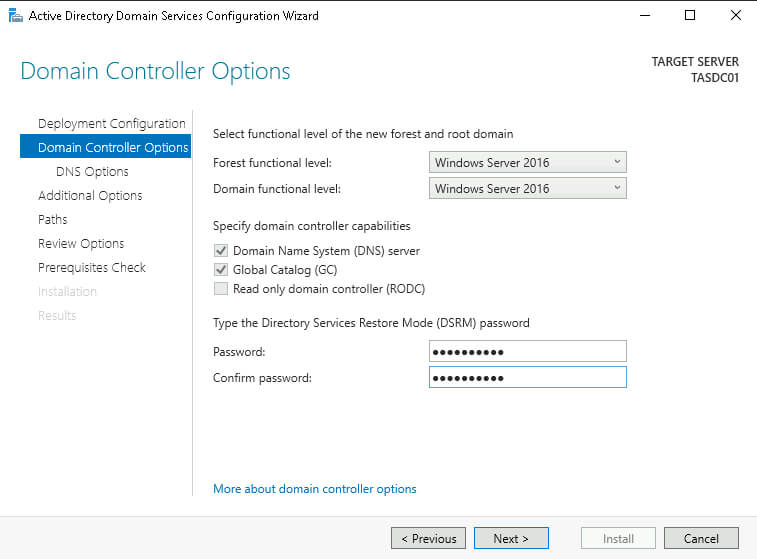
Next, provide a DSRM password and click Next through the following pages, using the defaults, and then, finally, click Install.
We now have a functioning Domain Controller!
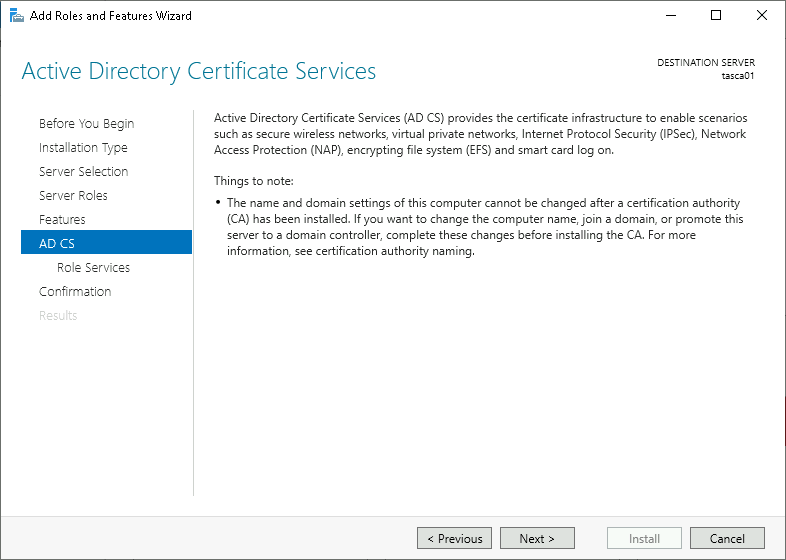
Configuring the AD CS server
In this section, we’ll create our vulnerable Certificate Authority (CA). First, we need to add a new Windows Server to the existing domain. To do this, on our new Windows Server, open the Control Panel and navigate to System and Security, and then click System. Under Related settings, click Rename this PC (advanced). In the Computer name tab, click Change and under Member of, click Domain and type the name of your domain, then click OK and reboot.
Most of the steps used to create the Domain Controller are replicated here, so please refer to the screenshots above.
Now we can install the Active Directory Certificate Services (AD CS) from the Server Manager through the Add Roles and Features wizard.
To begin, click Next on the Before You Begin page, ensure “Role-based or feature-based installation” is selected and, again, click Next.
Ensure our server is selected, then click Next.
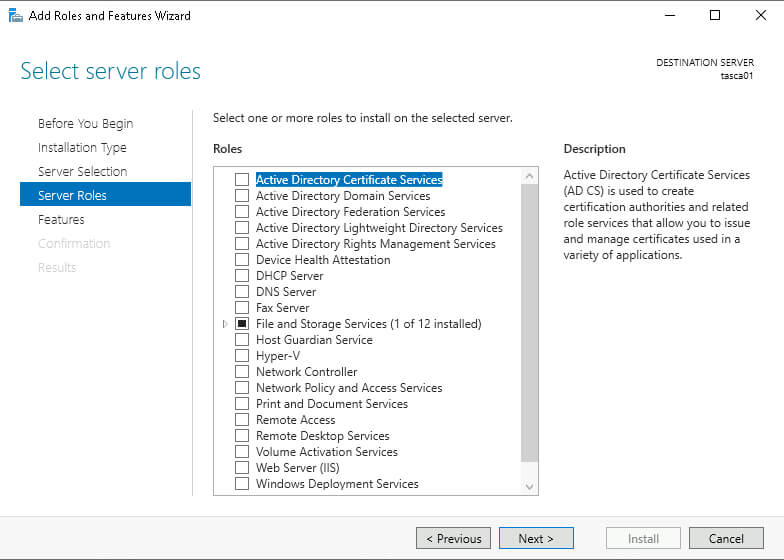
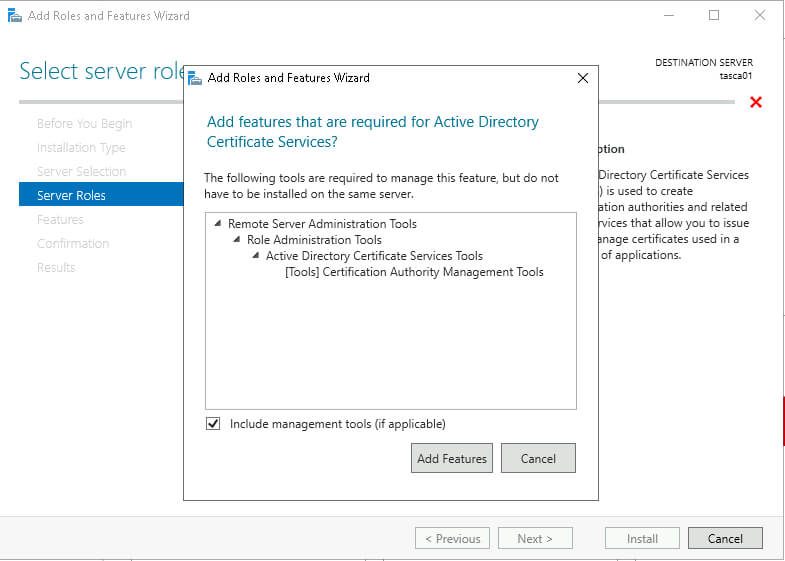
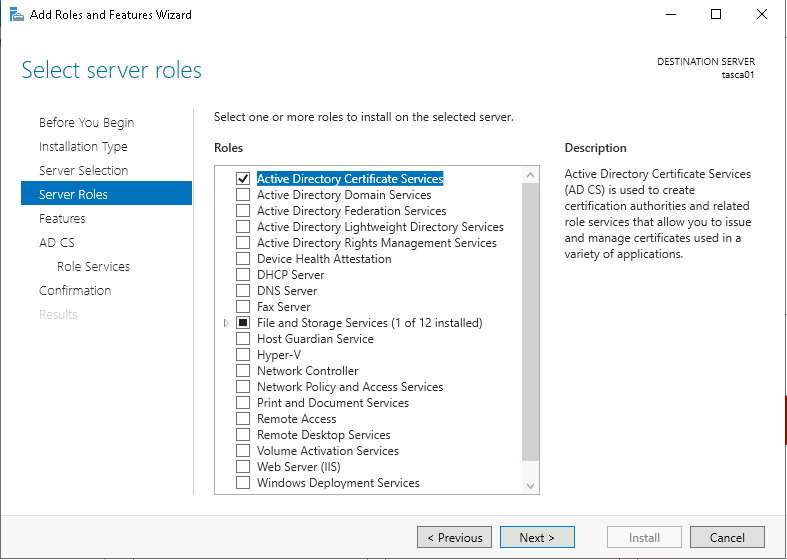
Select the Active Directory Certificate Services role.

Ensure both Certification Authority and Certification Authority Web Enrollment options are checked, clicking Add Features when prompted by the smaller pop-up window.

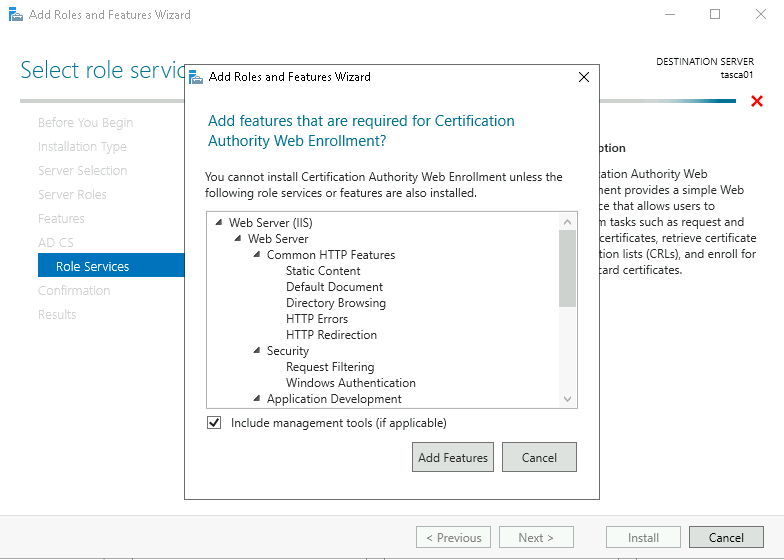
With both selected, click Next.

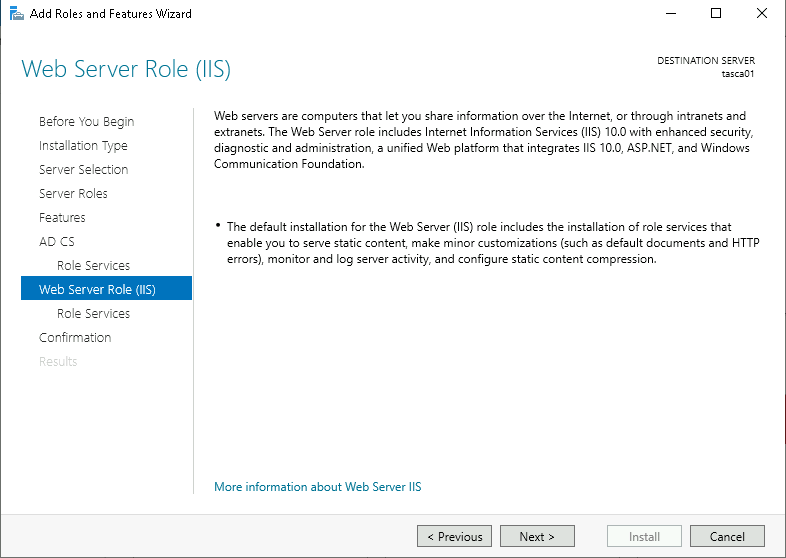
Click Next past Web Server Role (IIS).
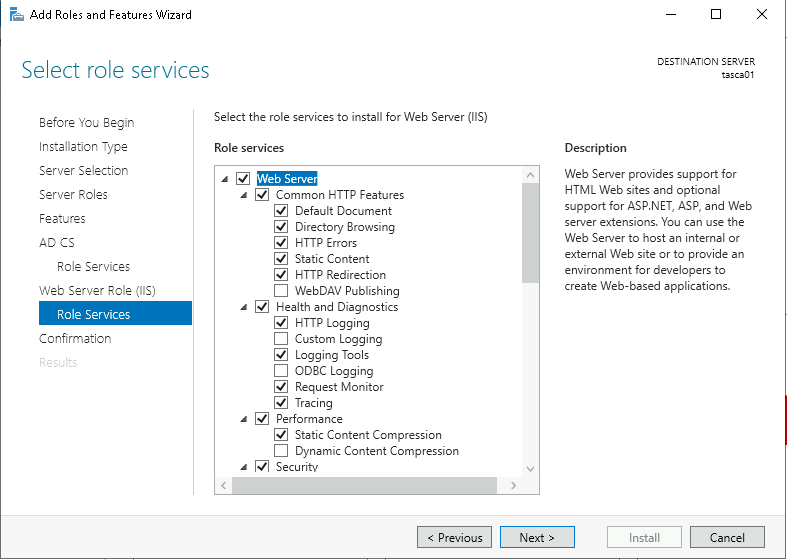
Leave the default configuration on the Select role services page and click Next,
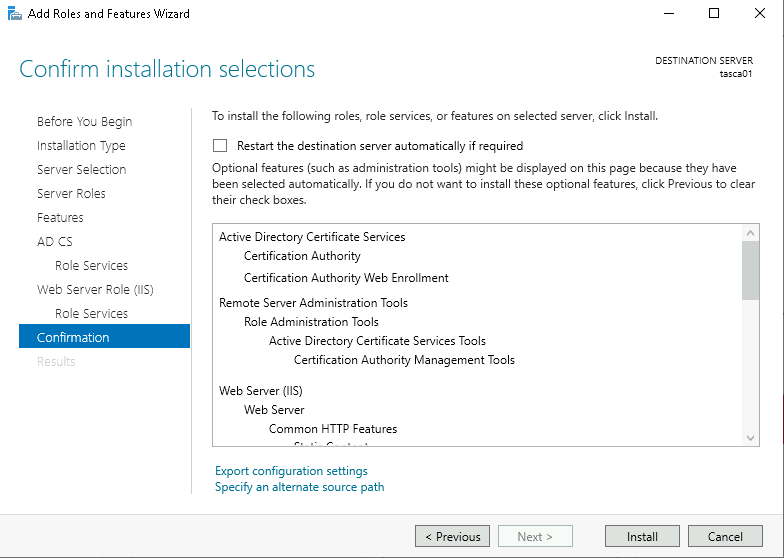
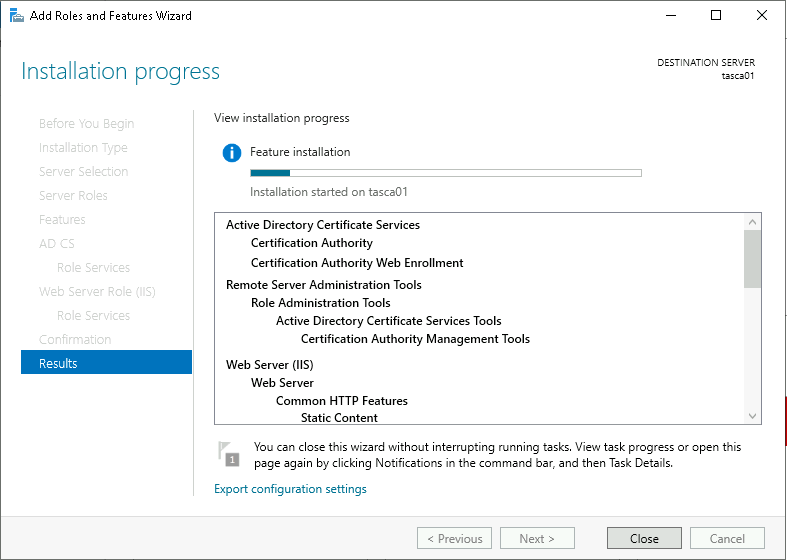
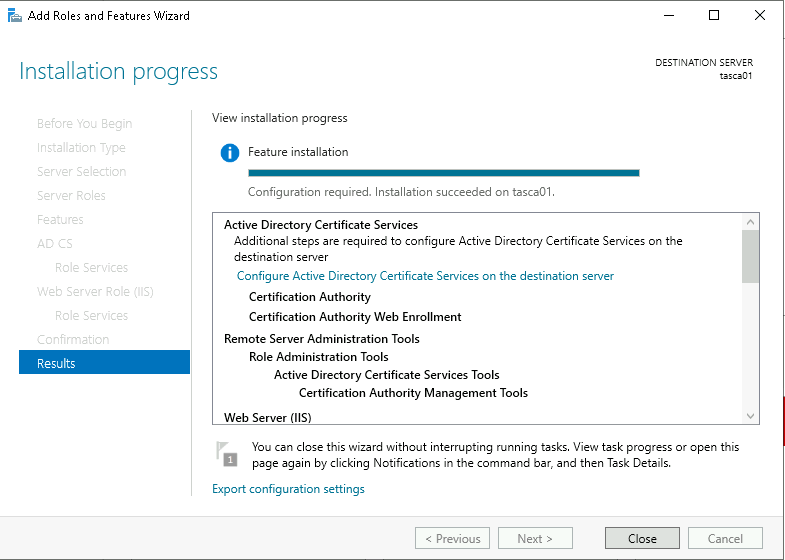
Once installed, click Configure Active Directory Certificate Services on the destination server.
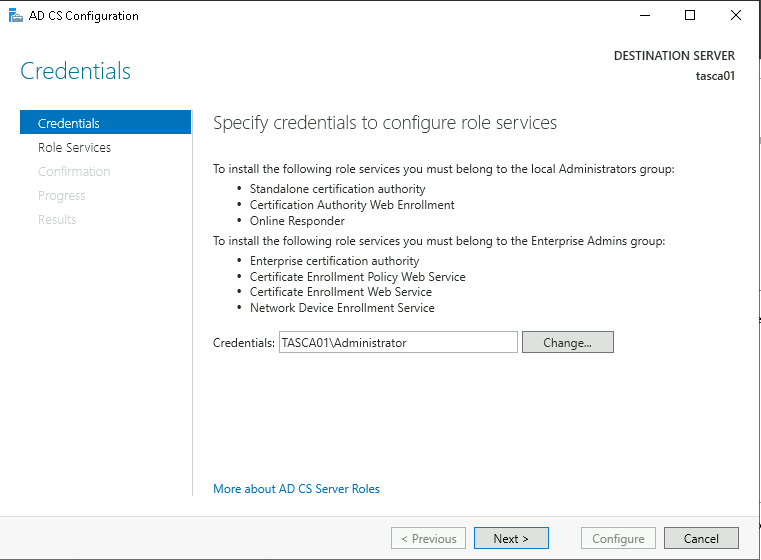
The credentials can be left Leave the default credential values and click Next.
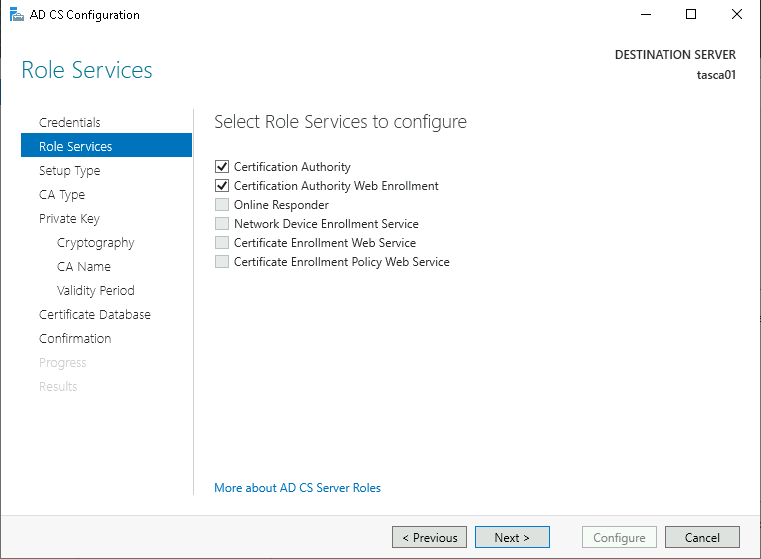
Ensure both Certification Authority and Certification Authority Web Enrollment are selected and click Next.
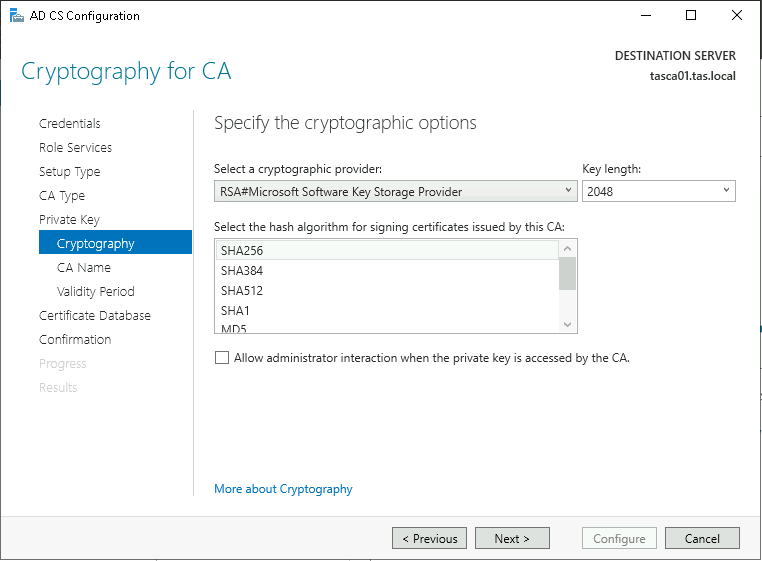
Default cryptographic options are fine for our purposes, so click Next.
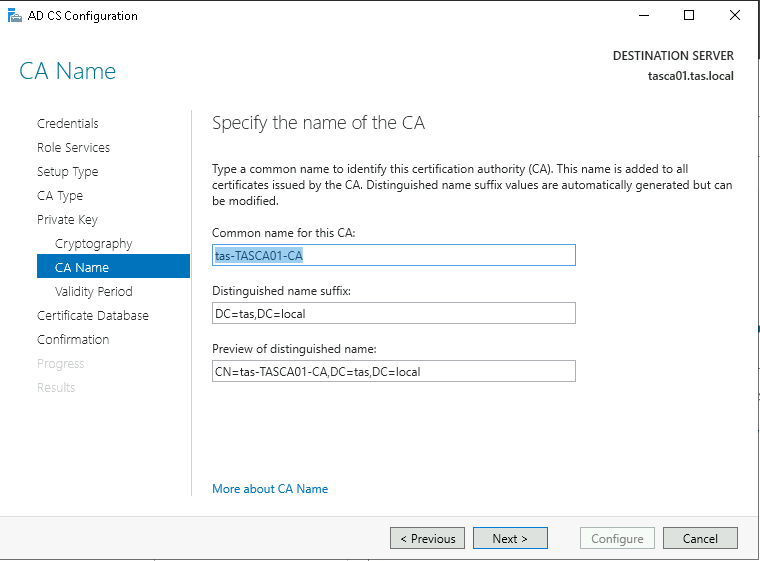
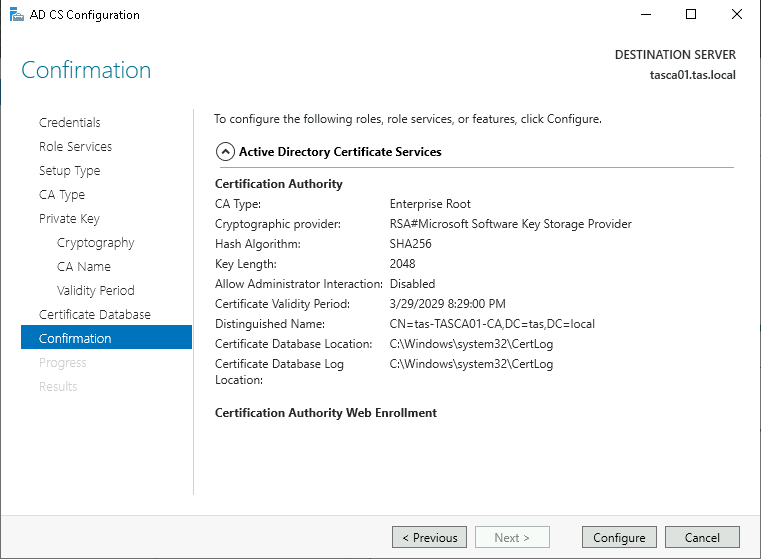
The default CA Name values are fine, click Next.
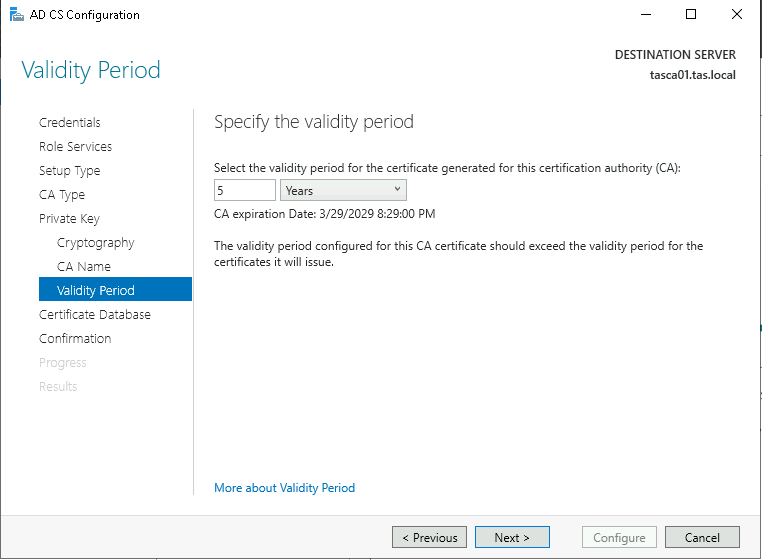
Default validity period of five years is fine as well, click Next.
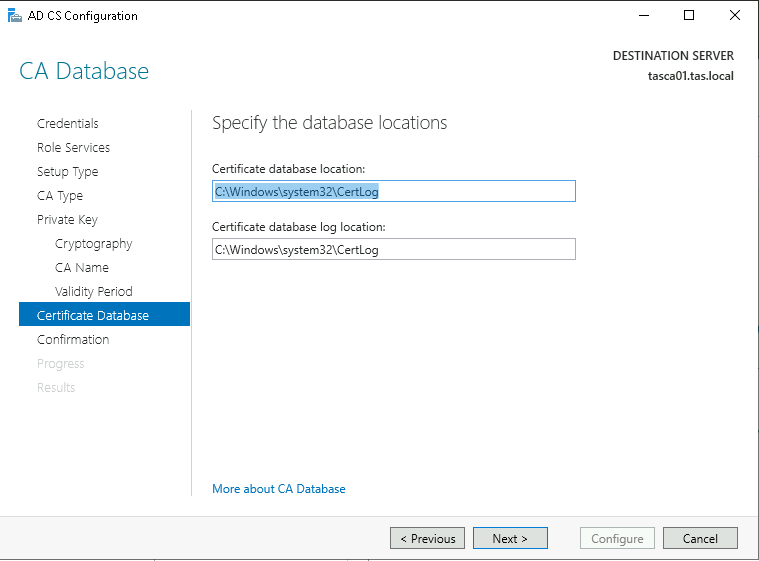
Click Next past the database location options.
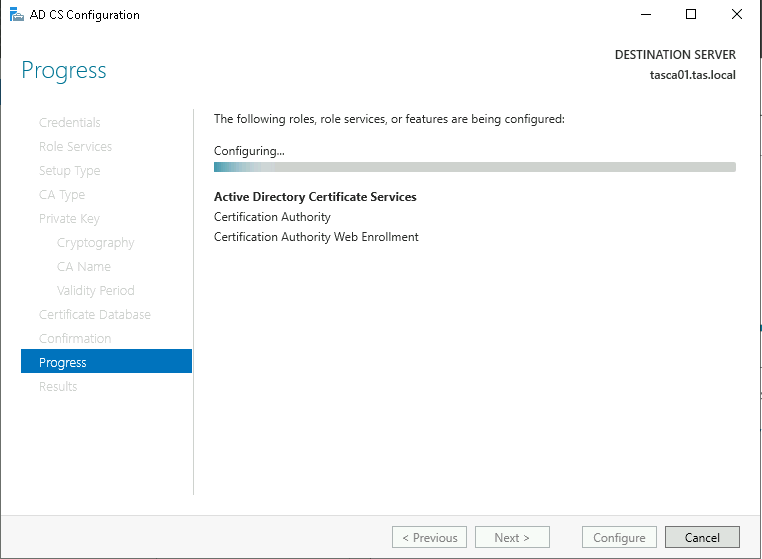
Configuring Debian
Within the Immersive Labs ranges, create a new system like before. However, this time we’ll choose the latest release of Debian (11 at the time of writing). We will leave the default configuration values except for RAM, increase to 4 GB, and a specific IP address.
Once the Debian host has powered on, we will connect via SSH! We will update our system and configure our labs’ DNS server. To do this, let’s follow the instructions outlined in the code blocks below:
Update our install:
sudo su
apt update && upgrade -y
Update our host file:
cat /etc/hosts
# Your system has configured 'manage_etc_hosts' as True.
# As a result, if you wish for changes to this file to persist
# then you will need to either
# a.) make changes to the master file in /etc/cloud/templates/hosts.debian.tmpl
# b.) change or remove the value of 'manage_etc_hosts' in
#     /etc/cloud/cloud.cfg or cloud-config from user-data
#
127.0.1.1 ip-10-10-0-100.ec2.internal ip-10-10-0-100
127.0.0.1 localhost
10.10.0.20      tasca01.tas.local tasca01

# The following lines are desirable for IPv6 capable hosts
::1 ip6-localhost ip6-loopback
fe00::0 ip6-localnet
ff00::0 ip6-mcastprefix
ff02::1 ip6-allnodes
ff02::2 ip6-allrouters
ff02::3 ip6-allhosts
Update our /etc/resolv.conf file:
cat /etc/resolv.conf
domain tas.local
domain ec2.internal
search ec2.internal
nameserver 10.10.0.10
nameserver 10.10.0.2
Use the host command to identify the IP address of the CA server:
host tasca01.tas.local
tasca01.tas.local has address 10.10.0.20
Install Git and Pip:
apt install git python3-pipNext, clone Certipy by ly4k:
cd /opt/tools
git clone https://github.com/ly4k/Certipy.git
Change directories into the Certipy directory and install the requirements using the pip utility:
cd Certipy/
pip install .
Use the certipy command to verify the installation:
> certipy
Certipy v4.8.2 - by Oliver Lyak (ly4k)

usage: certipy [-v] [-h] {account,auth,ca,cert,find,forge,ptt,relay,req,shadow,template} ...

Active Directory Certificate Services enumeration and abuse

positional arguments:
  {account,auth,ca,cert,find,forge,ptt,relay,req,shadow,template}
                        Action
    account             Manage user and machine accounts
    auth                Authenticate using certificates
    ca                  Manage CA and certificates
    cert                Manage certificates and private keys
    find                Enumerate AD CS
    forge               Create Golden Certificates
    ptt                 Inject TGT for SSPI authentication
    relay               NTLM Relay to AD CS HTTP Endpoints
    req                 Request certificates
    shadow              Abuse Shadow Credentials for account takeover
    template            Manage certificate templates

optional arguments:
  -v, --version         Show Certipy's version number and exit
  -h, --help            Show this help message and exit
Finally, we are ready for the exploitation phase!